
Hope you all had a lovely Christmas!!! Happy 2015 to you all!
Here is a little peak of what we did on our winter break.
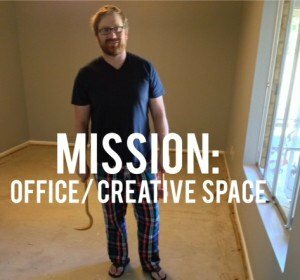
Mission: Office/Creative Space – Painted Concrete Floor
I forgot to take a true before picture – but you can picture with me a space with off white carpet and some accidental paint spills on it ![]() … not sure who did that!? LOL. Off white carpet and a creative space do not mix well …. at least not for me!!
… not sure who did that!? LOL. Off white carpet and a creative space do not mix well …. at least not for me!!
So we (and by “we” i really mean my husband) ripped out the carpet and the prep for painting began.
Side note: Every good team needs a visionary and then someone to execute that vision, right? So we make a great team!!! ![]()
Anyway– here is a lil tutorial of what “We” did.
Step One: with a long handled scraper scrape off excess glue, padding, etc left from removing carpet. Sweep up loose debris.
Step 2: Roll/Brush on Solu-Strip -purchased from Lowes. Let stand per instruction.

Step 3: Scrape up Solu-Strip, glue, etc ( it will become a thick gel like substance)
Step 4: Prep the concrete for paint. We chose to use an acid etching solution Prep & Etch (purchased from Lowes) applied with a garden sprayer.


Step 5: Rinse & Dry Floor – used the sprayer with water and towel dried and air dried floor overnight.
Step 6: We used Valspar Latex Porch & Floor Paint. Painted the baseboards and cut in the first 6 inches or so around the perimeter of the room. Applied 3 coats, thin first coat to assure adhesion. Then used a 9″ roller with 3/8″ nap with extension handle to roll paint on remainder of concrete floor. 3 coats – again applied a thin first coat to assure adhesion.


Step 7: After our paint dried.. we were ready to draw the lines for our stripes! (we had measured the room prior to starting the project to determine stripe width) Special tip for all you math majors: when deciding on stripe width, consider choosing a width that evenly or close to evenly divides into the total width of the room, so you do not end up with a funny small width stripe on one edge of the room. We chose a stripe width that would produce an odd number of stripes to allow us to keep the first & last stripe white – to avoid cutting in black along the long walls. (work smarter not harder. hahah) Now channel your inner type A persona and mark strip widths across the width of the room at short intervals that will then allow you to “connect the dots” with a straight edge (we used a long level) along the length of the room (use a pencil so you can erase any mistakes).

Step 8: Tape. Tape. Tape
We used Frog Tape. Begin on one side and carefully tape one continuous stripe to achieve a crisp straight line running the length of the stripe. Make sure you put tape in the stripe you will not be painting – leaving your drawn line barely exposed, so you can paint over it.

Step 9: Paint Stripes — yay!!! Finally!! ![]()


cut in the black stripe end with a 2″angle brush and the rolled on the remainder of stripe. Remove tape immediately & allow to dry.
Step 10: Roll on Clear-Seal. As you can see from photo it will appear cloudy when painted but will dry clear. Applied 2 coats.

Step 11: Fall in Love with your amazing floor & then try to forget about it as you will need to wait several days for floor to cure so then you can lightly place furniture back in space – may want to use furniture pads (ultimately about 30 days before the floor will completely cure.)
TA-DA!!!!!!!!!!!!!!

And there you have it… Hope this may help someone out there in the blogosphere! ![]()
We will now move on to the next part of our Mission>> Office/Creative Space Overhaul.
Signing off from The Whitehouse! Hope to see you soon!!
Happy DIY-in’